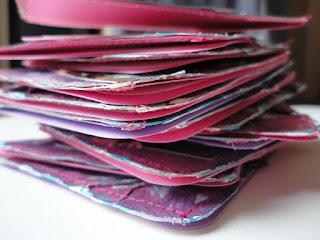
Introducing the fine work of 22 most excellent card artists, all of whom participated in the 6 Degrees of HLM International Card Swap this year. Below is a sampling of each person's contribution. The first photo is of everyone's cards spread out on my den floor. It was a tight squeeze! Thinking about it, this is 220 total cards! Whoa! A friend came by while these were all laid out, who thought I'd made all of them. I was quick to correct him and happy to show him the diversity of the group's talents. Remember, you can click on each photo for a better view.
Find yourself inspired!
Catrice (from California) not only made her cards, but lined her envelopes with complimenting papers:
Fe (from Fort Collins) used Japanese Sumi ink (caligraphy ink) with an object found at a vintage shop by a
friend. She said, "It is so pretty but I never figured out what it was for, or
the material (maybe acrylic? not sure), but I thought it would make a neat
stamp."
Grace (from California) was inspired by the desert:
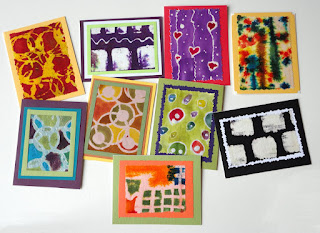
Jennifer makes art in California with her 3 year-old on a regular basis, and as a result, had a ton of dyed coffee filters laying around the house. In her resourcefulness, she made these out of them:
Kiara was inspired by themes she's been studying in her PhD program in Minnesota: ecological ethics from religious convenantal perspectives, and using Hebrew iconography:
Andrea (from Fort Collins) made two designs, both using pieces from a kit that her mom lovingly and painstakingly put together for her as a Christmas gift. So Andrea's mom indirectly participated in the swap.
Anne (from Colorado), whipped these up during the work party at my place in April. I admired her stamping know-how for sure:
Ashley (from California for just a few more weeks) has been wanting to do a project like this for over 15 years: a photo study of basic everyday items, then collaged. This opportunity provided just the kind of "good stress" she needed while finishing up her master's degree program.
Cecilio (from Colorado) designed his cards with the writer in mind. The middle square of each card is vellum (which is translucent). This means that once the card is written, the writer's handwriting becomes part of the artwork.
Gaye (from Fort Collins) was excited to experiment with using fabric in her card design:
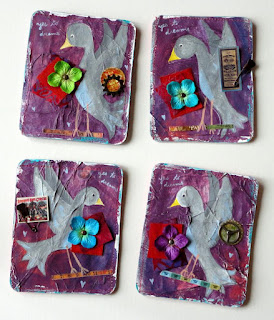
I made two different designs this year, as I was equally inspired by two different ideas. You'll learn more about both cards in a future blog post! Click here to see a related post about a painting I've been working on that inspired the purple cards, and the cool thing about the flower fold-y cards is that when you pull them open, your hand-written message flips to the front!
Ambra (from Italy for just a few more weeks, then coming back to the States) made these butterflies by collaging a bunch of scrap papers together. The background is collaged masking tape tinted with crayon.
Betsy is from Minnesota and each of her cards had real leaves under the vellum:
Connie (from Minnesota) has been studying batik this year after a workshop she attended in Arizona. She says she started on paper and has been moving over to fabric.
Shari (from Colorado) likes cherries and was in fact the recipient of what seemed like hundreds of handmade cards a while ago all based on a cherry theme. The theme continues to inspire her.
Sue considers herself an Iris Fold artist and some of her cards are at this website. She is from Minnesota.
April's cards were dipped in tea, and the quote complements the technique well:
Darlene (from Minnesota) calls the technique she used for her cards "flower pounding." Connie described the idea to me this way: "Lay flower petals face down on a piece of
watercolor paper and cover it with a paper towel, then board-pound it with a hammer. After it is dry, you scrape off excess petals and then use a very
fine marker to go around and into the spaces."
Katie (from Fort Collins) was the first one done with her cards this year, as she knew her baby's due date was right around the card swap deadline. Then baby didn't arrive till later and Katie had run out of projects in her efficiency! She managed to find some new ideas while she waited, even finished a quilt!
Paige, also from Fort Collins, wasn't sure she'd get her cards done in time, but thankfully she did, just under the wire.
Phuong lives in Massachusetts and was excited to be back in the swap after her year off last year while traveling the world. She made these tri-fold cards for this year's swap:
Last but not least, Mivvy used up some extra beads, wire, or copies of photos and stock greeting cards to make her cards before leaving her hometown in England for a 6-week vacation in the Netherlands and Italy. (Lucky!)
Here are all the cards, distributed and packaged up. Thank you to everyone who participated this year. Your contributions are what made this project such a success. Please invite your friends for next year's swap and start thinking of your design today for next time. :)


