Wednesday, July 27, 2011

98th Post: New/Old Projects & GIVEAWAY!

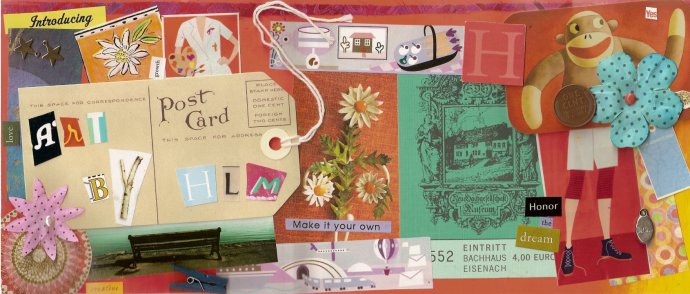
Sorry for the week-long delay this time around!  (I've had company.)  Here are some more cards I made for some favorite peeps, once again out of the collage I made here. (Remember to click on the image for a better view.)


Today, I am making a few more cards, but more than anything I am hoping to get to this project.  I started this painting about 2 years ago, and once I got it to this stage, I put it away, uninspired.  My style has developed since then, and when I was forced to bring it out into the light a couple weeks ago, I hung it up and was able to see it with fresh eyes.  I can't wait to get going on it again.  I think it will look much different later on.  Of course, you will get to see the final product when it happens!


Finally, the winner of the last blog giveaway was Kyran!  Thanks for liking me on Facebook, Kyran!

This week, I am giving away 10 handmade envelopes.  Many of you know that I have made envelopes out of old calendars for years.  I blogged about it awhile ago, here.  I am planning to share a booth at a craft fair in August in Aurora, and am considering selling these.  


To enter this week's giveaway drawing, you can do one or more of these things:

1.) Fill out my "Up-cycled Envelopes" poll to the right and leave a comment below saying you participated (along with anything else you'd like to say).
2.) Like Parsley Art Studio on Facebook!  (Anyone new since July 19 will be entered.)
3.) Tell your friends!  For anyone who either leaves a comment (and tells me you sent them) and/or becomes a follower, you get another entry.

Anyone can enter--I'll send this set of cards anywhere in the world and include envelopes for each card.  This drawing will close at midnight (mountain time) on Tuesday, August 2, and I'll announce the winner in my next post.  Remember to come back next week for another giveaway (one each week through my 100th post), and good luck!


Thursday, July 14, 2011

97th Post: Pretty Ice Pack Holder & GIVEAWAY


What is it, you ask?  Well, holding ice to your body is never very fun.  Aside from the dripping bag (have you noticed even brand new ziplocs leak?), I find that it is simply uncomfortable to hold the ice pack--your hand gets cold and you're sometimes having to perform body contortions.  Plus, every time you move, the ice pack falls out of place.  Having a need to ice my lower back fairly regularly in the last few weeks led me to design this beaut.  Here's how it looks tied on (notice my hands are nowhere near the ice pack!):


I've experimented and determined that it can be tied to almost any part of your body.  The ice pack simply slides into the pocket at the back:


Close up of the tie--just a simple knot.


I think I might try to sell these on Etsy.  They are quick to make, and I think some people might like the idea that they are certainly nicer to look at than some other products out there (including the wet ziploc).  

Thank you to all of you who became followers or left a comment after last week's post!  I made a list of each person's entry based on when you commented or became a follower (or emailed me when there was one day that blogger seemed to be having issues).  I used on online random number generator and it picked Phuong as the winner!  Congratulations, Phuong!

For this week's giveaway, I've made a set of mini cards from the paper I wrote about in post #95.  The photo makes them look larger than they are;  the tallest card (middle) is about 4" tall.  Click on the photo if you want a closer view.


To win this week, you can once again do multiple things (though some are different from last week):

1.) Leave a comment on this post!  Any feedback you can give on the ice pack holder would be particularly appreciated.
2.) Like Parsley Art Studio on Facebook!
3.) Tell your friends!  For anyone who either leaves a comment (and tells me you sent them) and/or becomes a follower, you get another entry.

Anyone can enter--I'll send this set of cards anywhere in the world and include envelopes for each card.  This drawing will close at midnight (mountain time) on Tuesday, July 19, and I'll announce the winner in my next post.  Remember to come back next week for another giveaway (one each week through my 100th post), and good luck!

Wednesday, July 6, 2011

96th Post: Pop-up Card Story & GIVEAWAY!


As promised, here is the story of the pop-up card I made for the 2011 Six Degrees of HLM International Card Swap!  The idea came to me a few years ago--I wanted a challenge, and to learn about pop-ups.  I borrowed some lackluster books on the subject from the library and scrutinized another couple of pop-up cards I'd received and kept from over the years.  Then this February, I attended a friend's art night one wintery Thursday evening and developed this prototype (remember to click once on each photo for a closer view):


It didn't close properly, and the measurements were far from exact, but it worked, and it helped me to develop my design for the final card.  So I began cutting out or creating the various components.  Roads, buildings, trees, suns, lakes, sailboats, the grassy forefront, the blue sky, and fluffy clouds.  Not to mention the base of the card, made of black cardstock.


Then I began to assemble.


I knew that I wanted it to be not only a pop-up scene but also an actual card, where a message could be written without obstructing the view (haha!).  So I designed this tri-fold cover for the card.  You'd unwind the string from the button, unfold the top flap to reveal the message first, then carry on unfolding to reveal the surprise that is the cityscape.


To hold the card open for display, you can fold the top flap back and re-tie it to the button.


Here is some detail:


And so, in honor of my approaching 100th post, I am offering you a chance to win one of these most excellent cards.  If I were to try to sell this card, I'd have to charge some exuberant amount of money for the time it took to make it. So I'd rather not bother, and instead I'd like to make your day!

To enter your name for the giveaway, there are many things you can do. The more you do, the more times your name will be entered into the drawing:

1.) Simply leave a comment on this post. (For instructions, see right.)
2.) For an additional entry, become a follower of my blog!  (Click on the Follow button to the right, right below my contact email.)
3.) Tell your friends!  For anyone who either leaves a comment (and tells me you sent them) and/or becomes a follower, you get another entry. 
4.) If you live nearby, signing up for one of my classes (click here to learn more) gets your name entered into the drawing two more times.


Anyone can enter--I'll send this card anywhere in the world and include an envelope.  This drawing will close at midnight (mountain time) on Tuesday, July 12, and I'll announce the winner in my next post.  Remember to come back next week for another giveaway (one each week through my 100th post), and good luck!

(Special thanks goes to my photographer sister Ashley for taking these fabulous photos! To see more of her work, click here.)

Thursday, June 30, 2011

"Handmade" Paper & 95th Post


Hey there art fans!  In my last post, I mentioned making "my own" paper, and I wanted to show you what I meant.  I got this idea straight from someone else,  and despite being skeptical throughout the process of making it, I think the final product is brilliant  The three little ones on the right are how I took last week's paper to the next step, having taped over the edges to make a frame and then painted.  I don't know exactly how these will turn out, but have no doubt that you'll see it here for sure.  The big one on the left I made today, with a different matte-finish 
glue--which actually didn't work as well as the first one, with straight-up Elmer's.  

I know the idea comes from an artist who was featured in a recent issue of Cloth, Paper, Scissors, but I unfortunately don't know who (I only had a chance to glance at the article).  The technique involves tearing up papers that look good together into strips, then gluing them down to a smooth piece of plastic (like a thin, malleable cutting board) with a brush.  First, brush glue on the plastic, then lay down a strip, then brush glue over the top.  Continue until the whole plastic sheet is covered, then leave to dry completely.  Once dry, peel the whole thing off the plastic and there you have it!

Today marks my 95th post, which means that I'm five away from 100!  Wow.  I'm amazed to have carried on this long.  So, to celebrate, starting next week I plan to give something away every week to a randomly selected reader.  Please come back weekly for the next 5 weeks (I post on Wednesday or Thursday) to find out what's on offer and how to win.

Thursday, June 23, 2011

Newsletter


Today I spent art day doing all sorts of things: making Grandma's b-day card, shipping some stuff off to Dad, talking the business of art with my friend Brittany (who came over to share art day with me), trying a new technique for making "my own" paper, setting up a Parsley Art Facebook page (Like me!), and creating my first ever e-Newsletter!  If you didn't receive this in your inbox today, contact me (using the address to the right under "Contact"), and I'll put you on the distribution list.  You'll get the newsletter once a month, and I vow to not pass your information on to anyone else.  


If you are arriving to my blog to learn more about my Here and Now in the Studio, see below for more on the skirt, and I'll post very soon some good photos of the pillow and the gray quilt-pieced thing, which is actually an ice pack holder.